This is a sponsored conversation written by me on behalf of Cricut. The opinions and text are all mine.
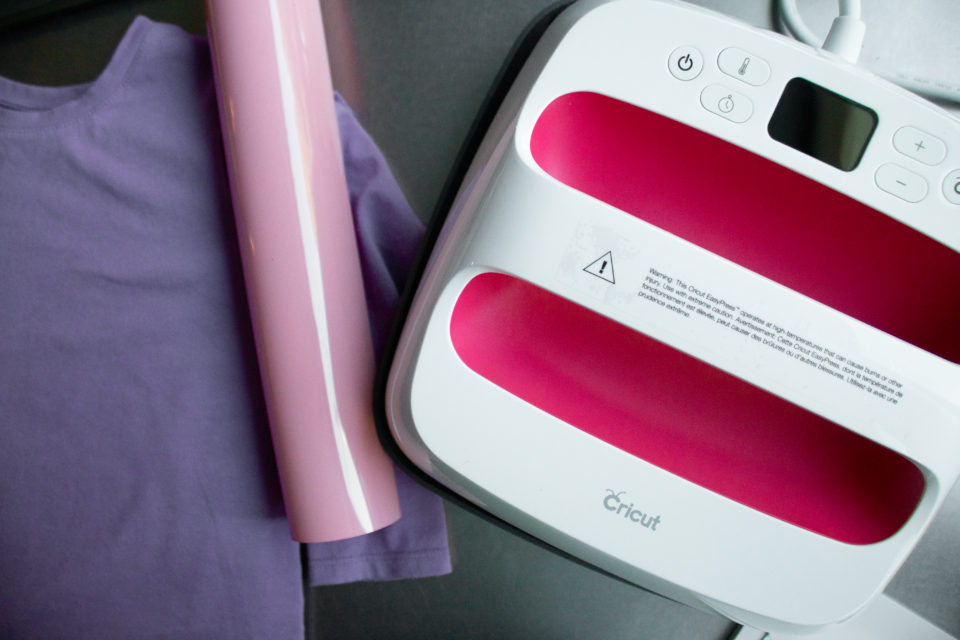
Now that Elara is three she is obsessed with all things glittery, unicorn and princesses. And since her wardrobe lacks it, she also gives us a hard time about what she’ll wear. Lately, she flat out refuses to wear shirts with no design on them, and luckily for her, I recently received an EasyPress 2 from Cricut. It’s a large iron-on tool that heats up evenly so that the iron-on vinyl sticks on real good and doesn’t wash or peel off after. I started by going through various designs on Cricut’s software and I let Elara pick which unicorn iron-on template she liked best.
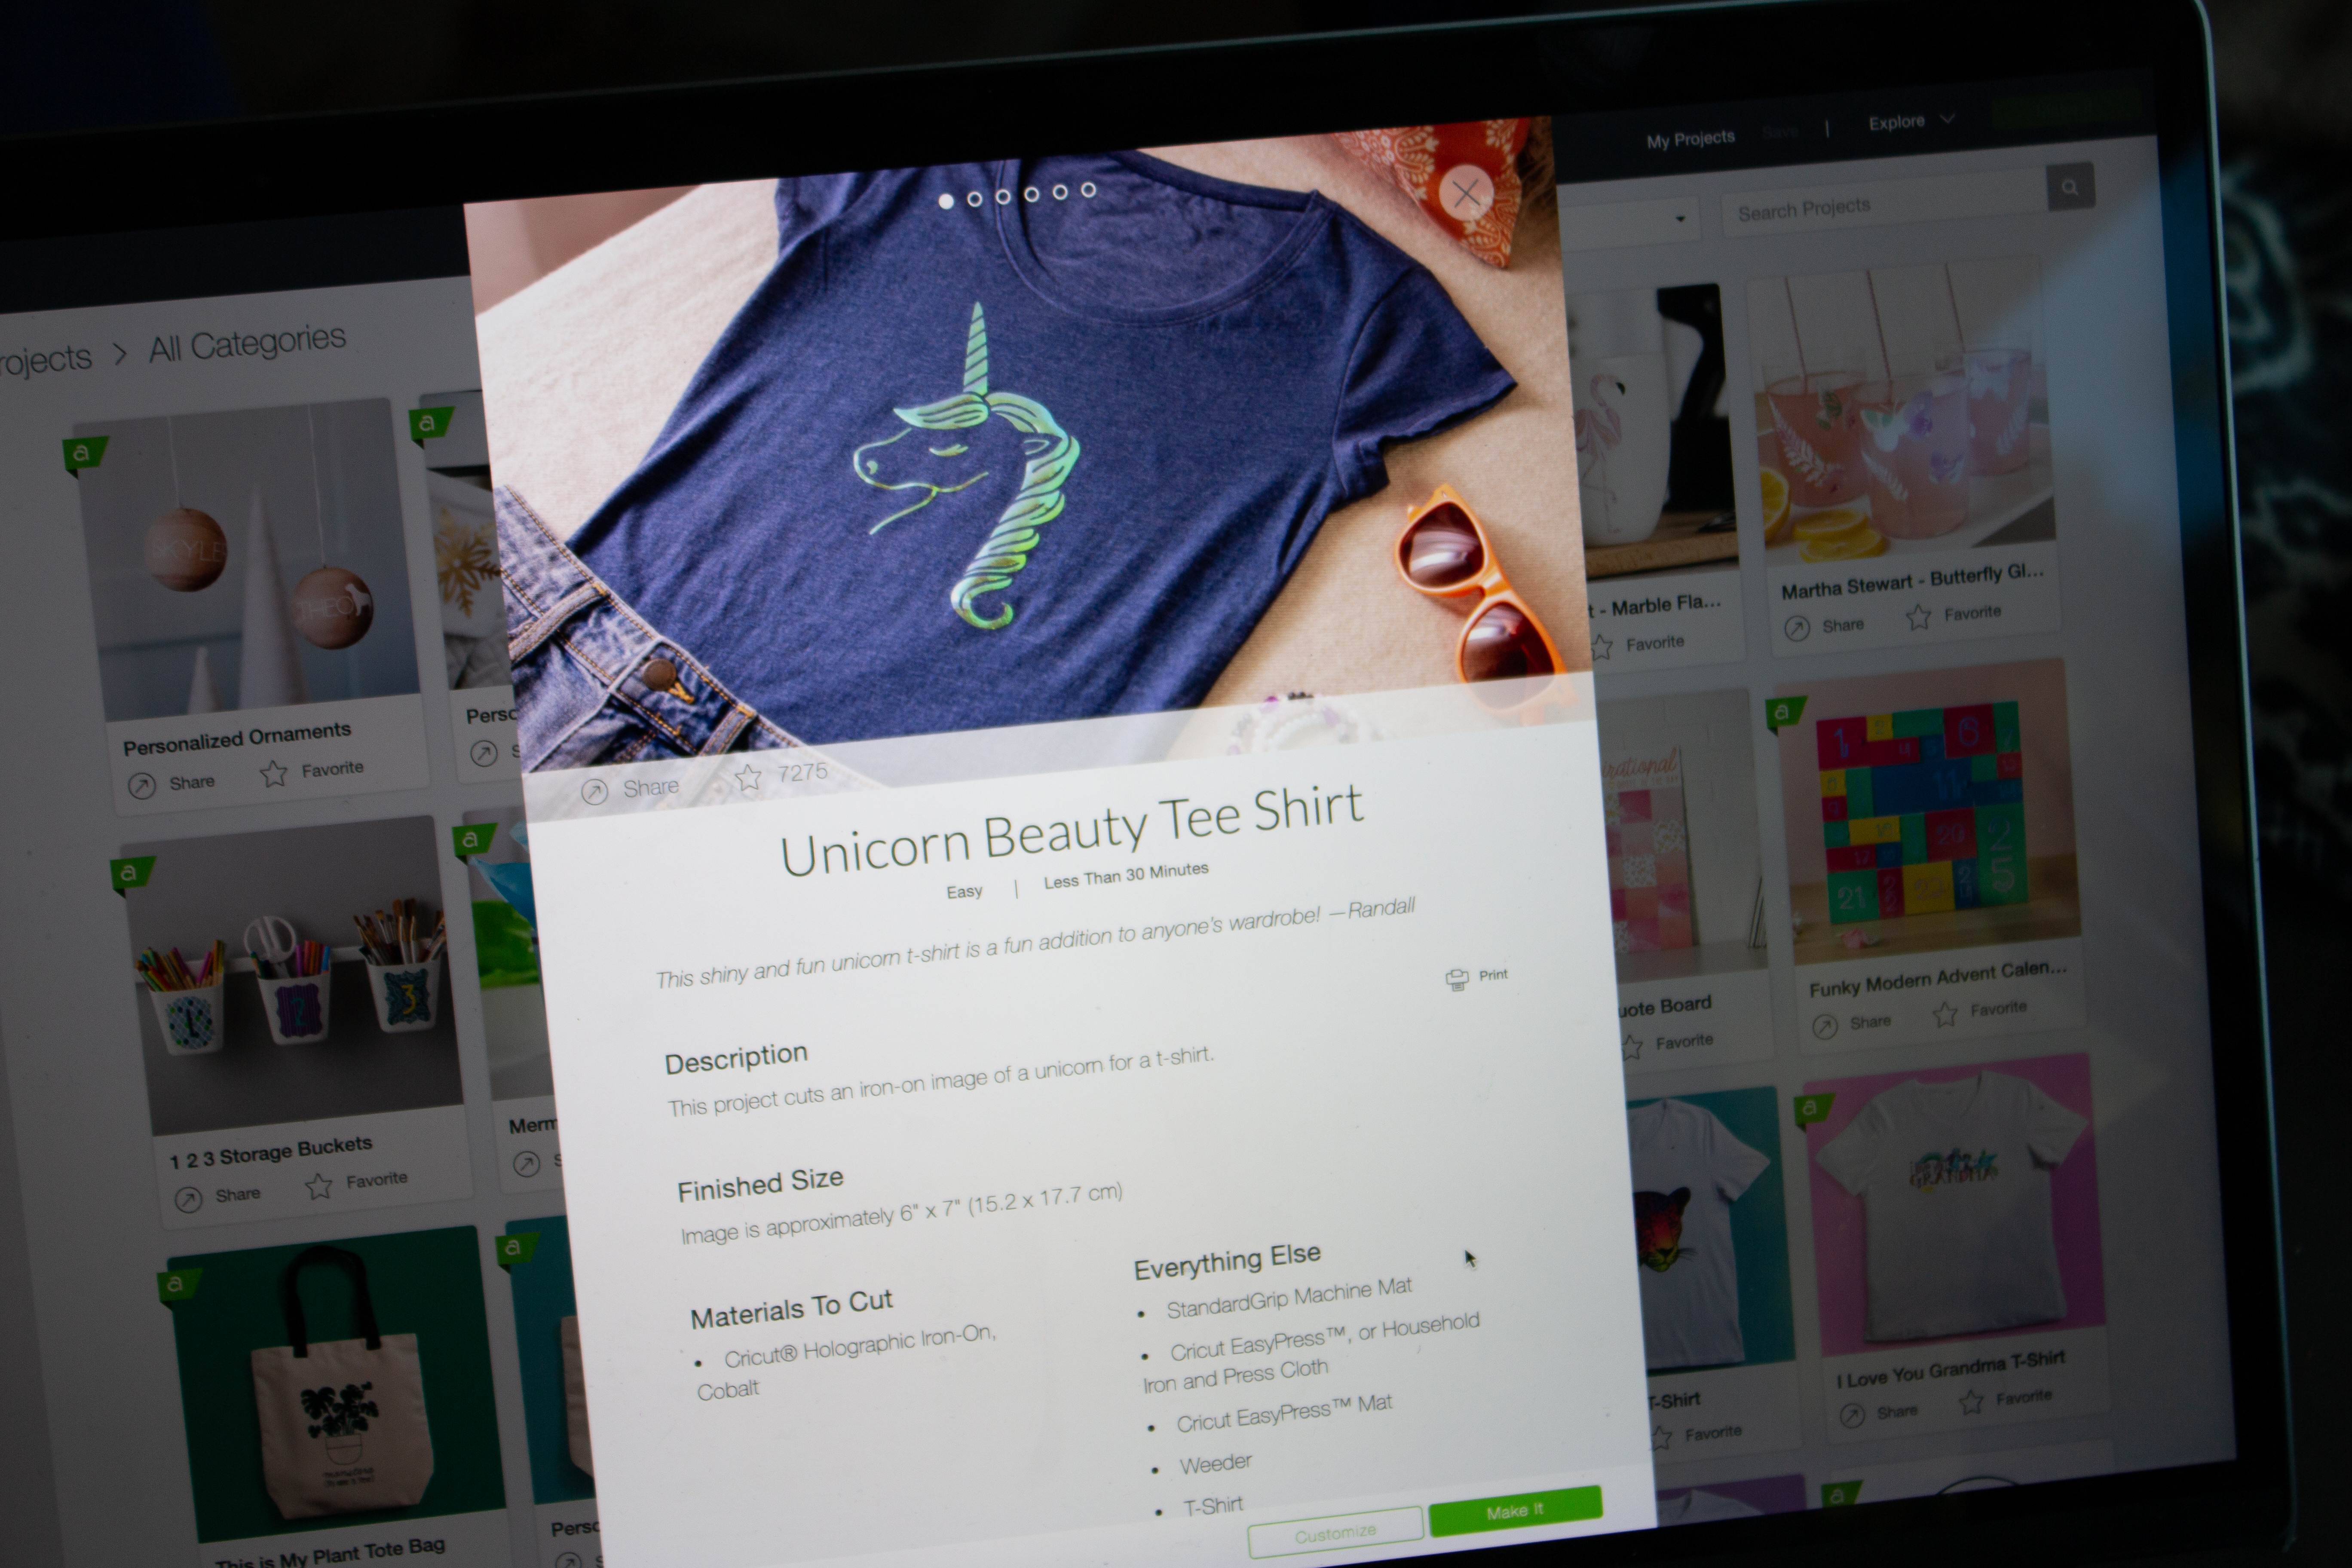
We didn’t have the holographic iron-on vinyl so Elara settled for a pretty pastel pink color from Cricut’s Everyday Iron-On samples. I loved how they include tips and tricks in the software to help you get the best results and they are especially helpful for newbs like me! I followed the directions and used the Cricut Explore Air 2 to cut out the unicorn template Elara chose into the pink iron-on vinyl.
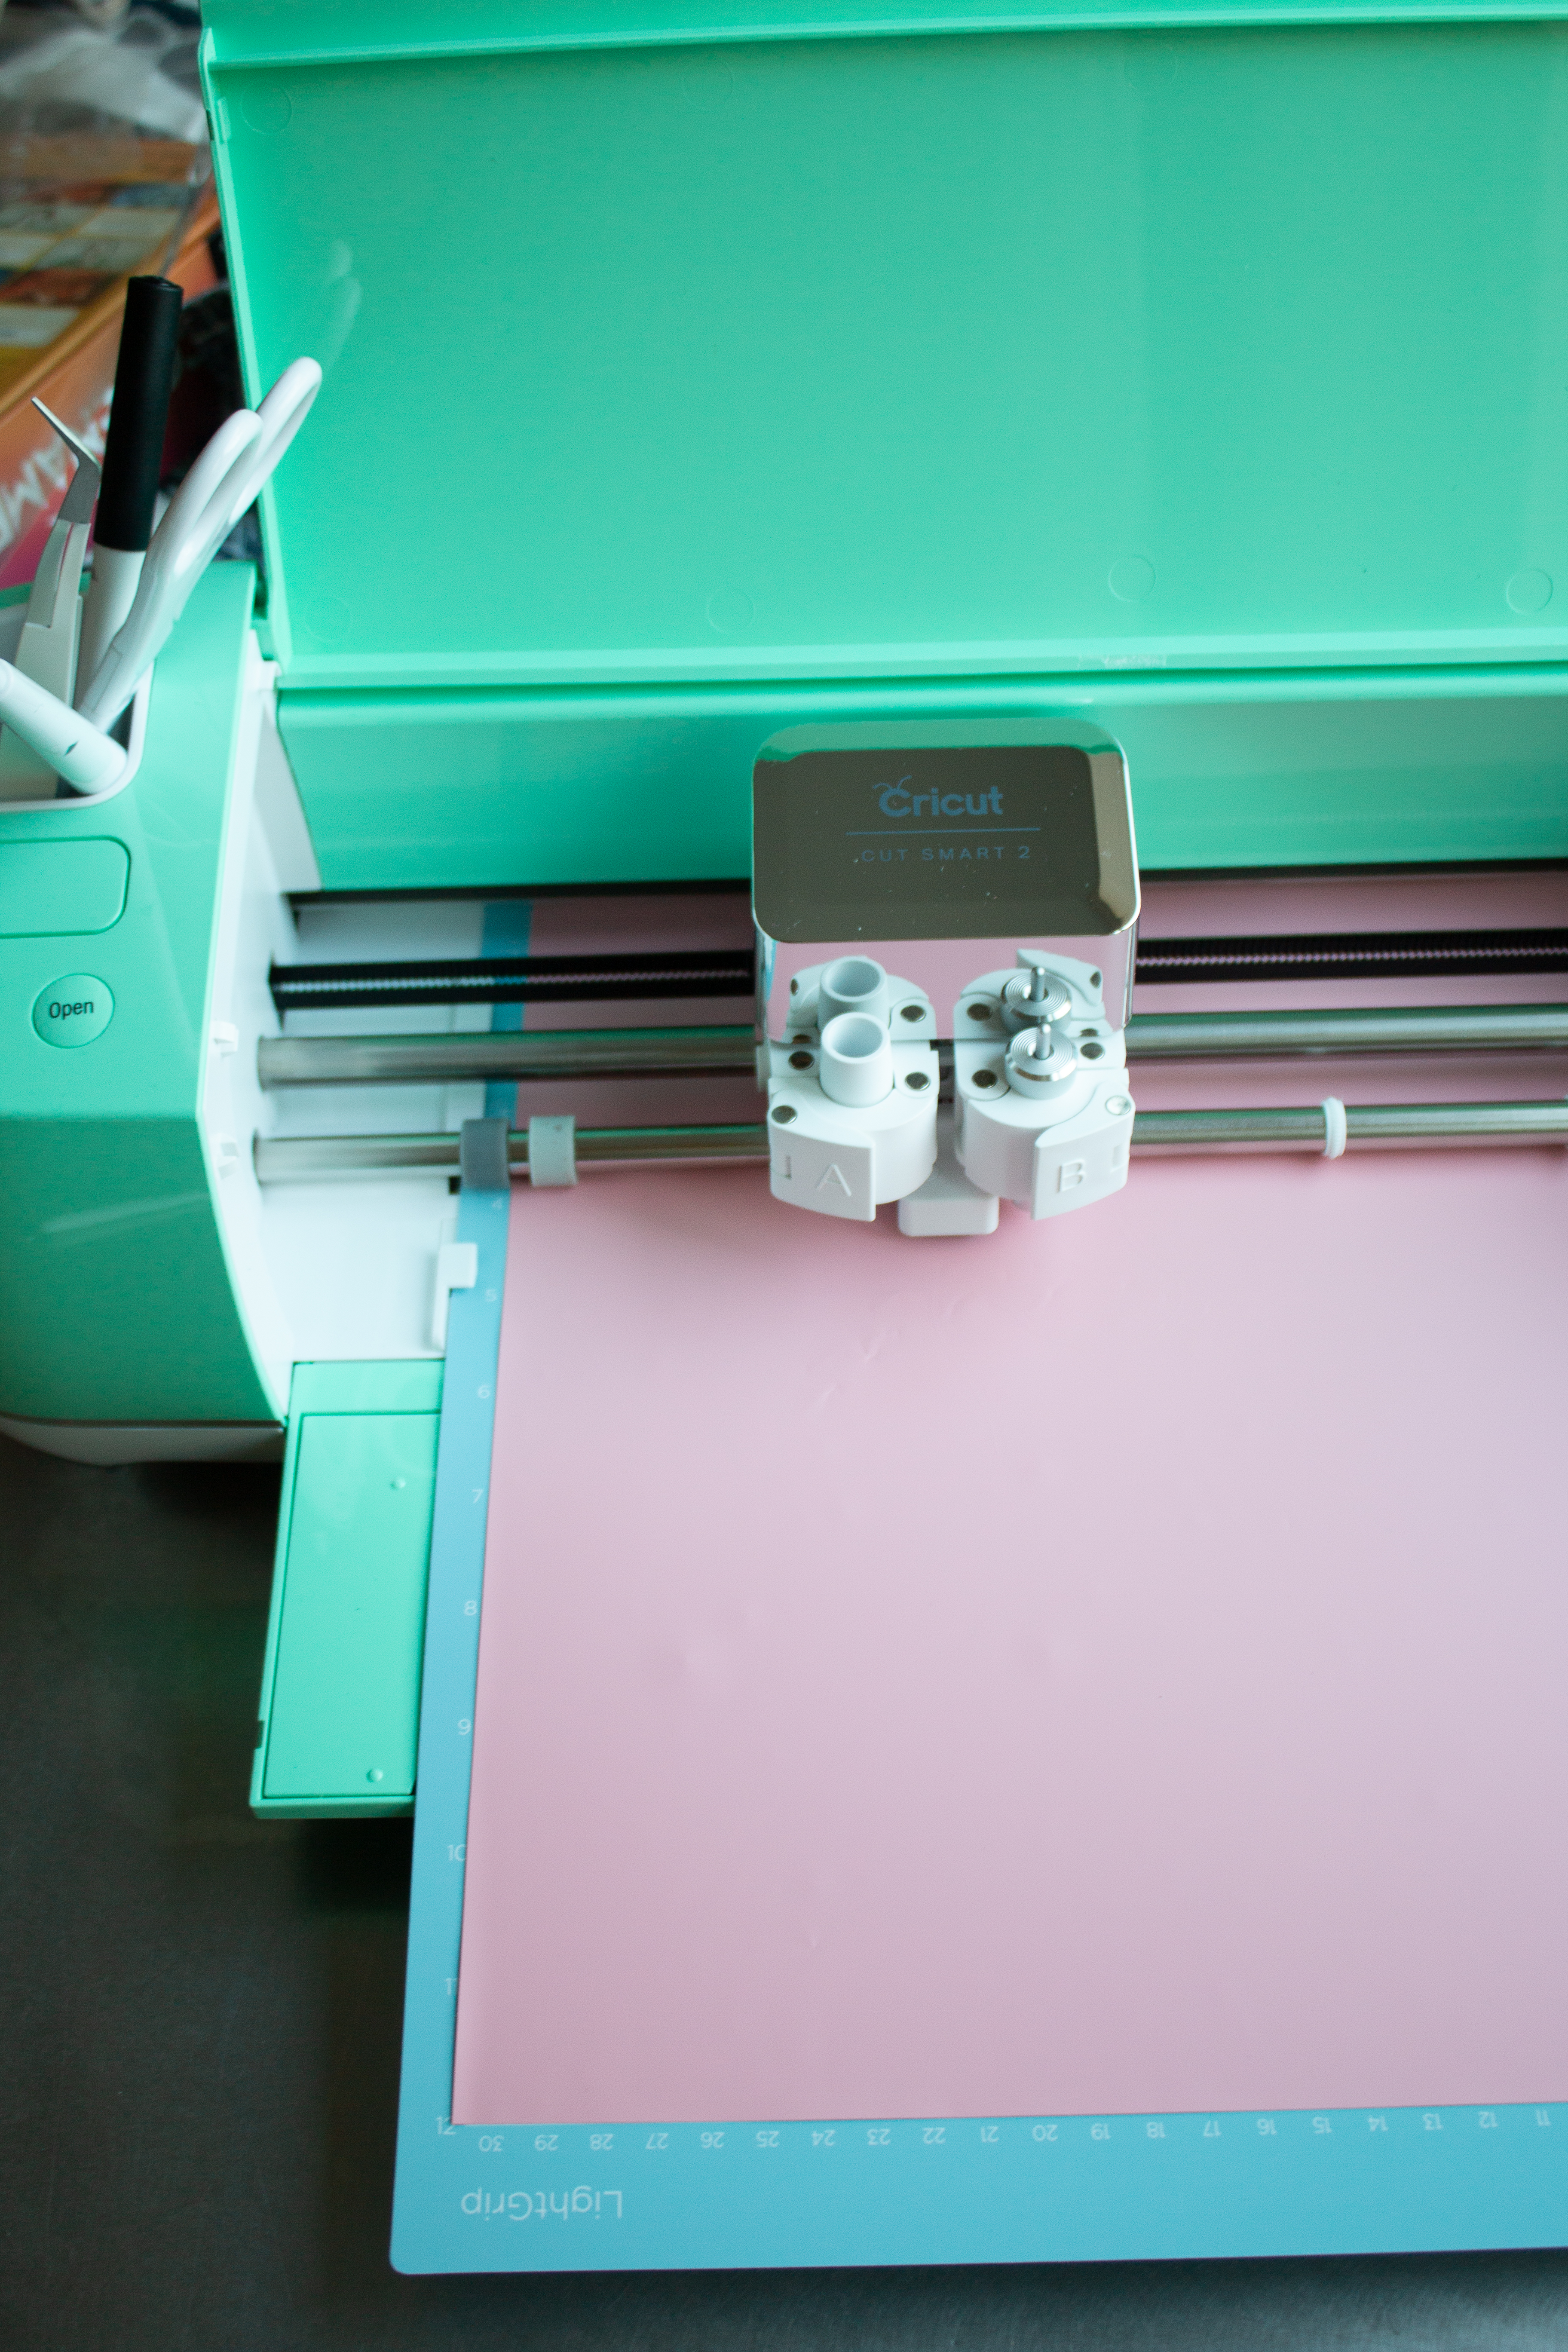
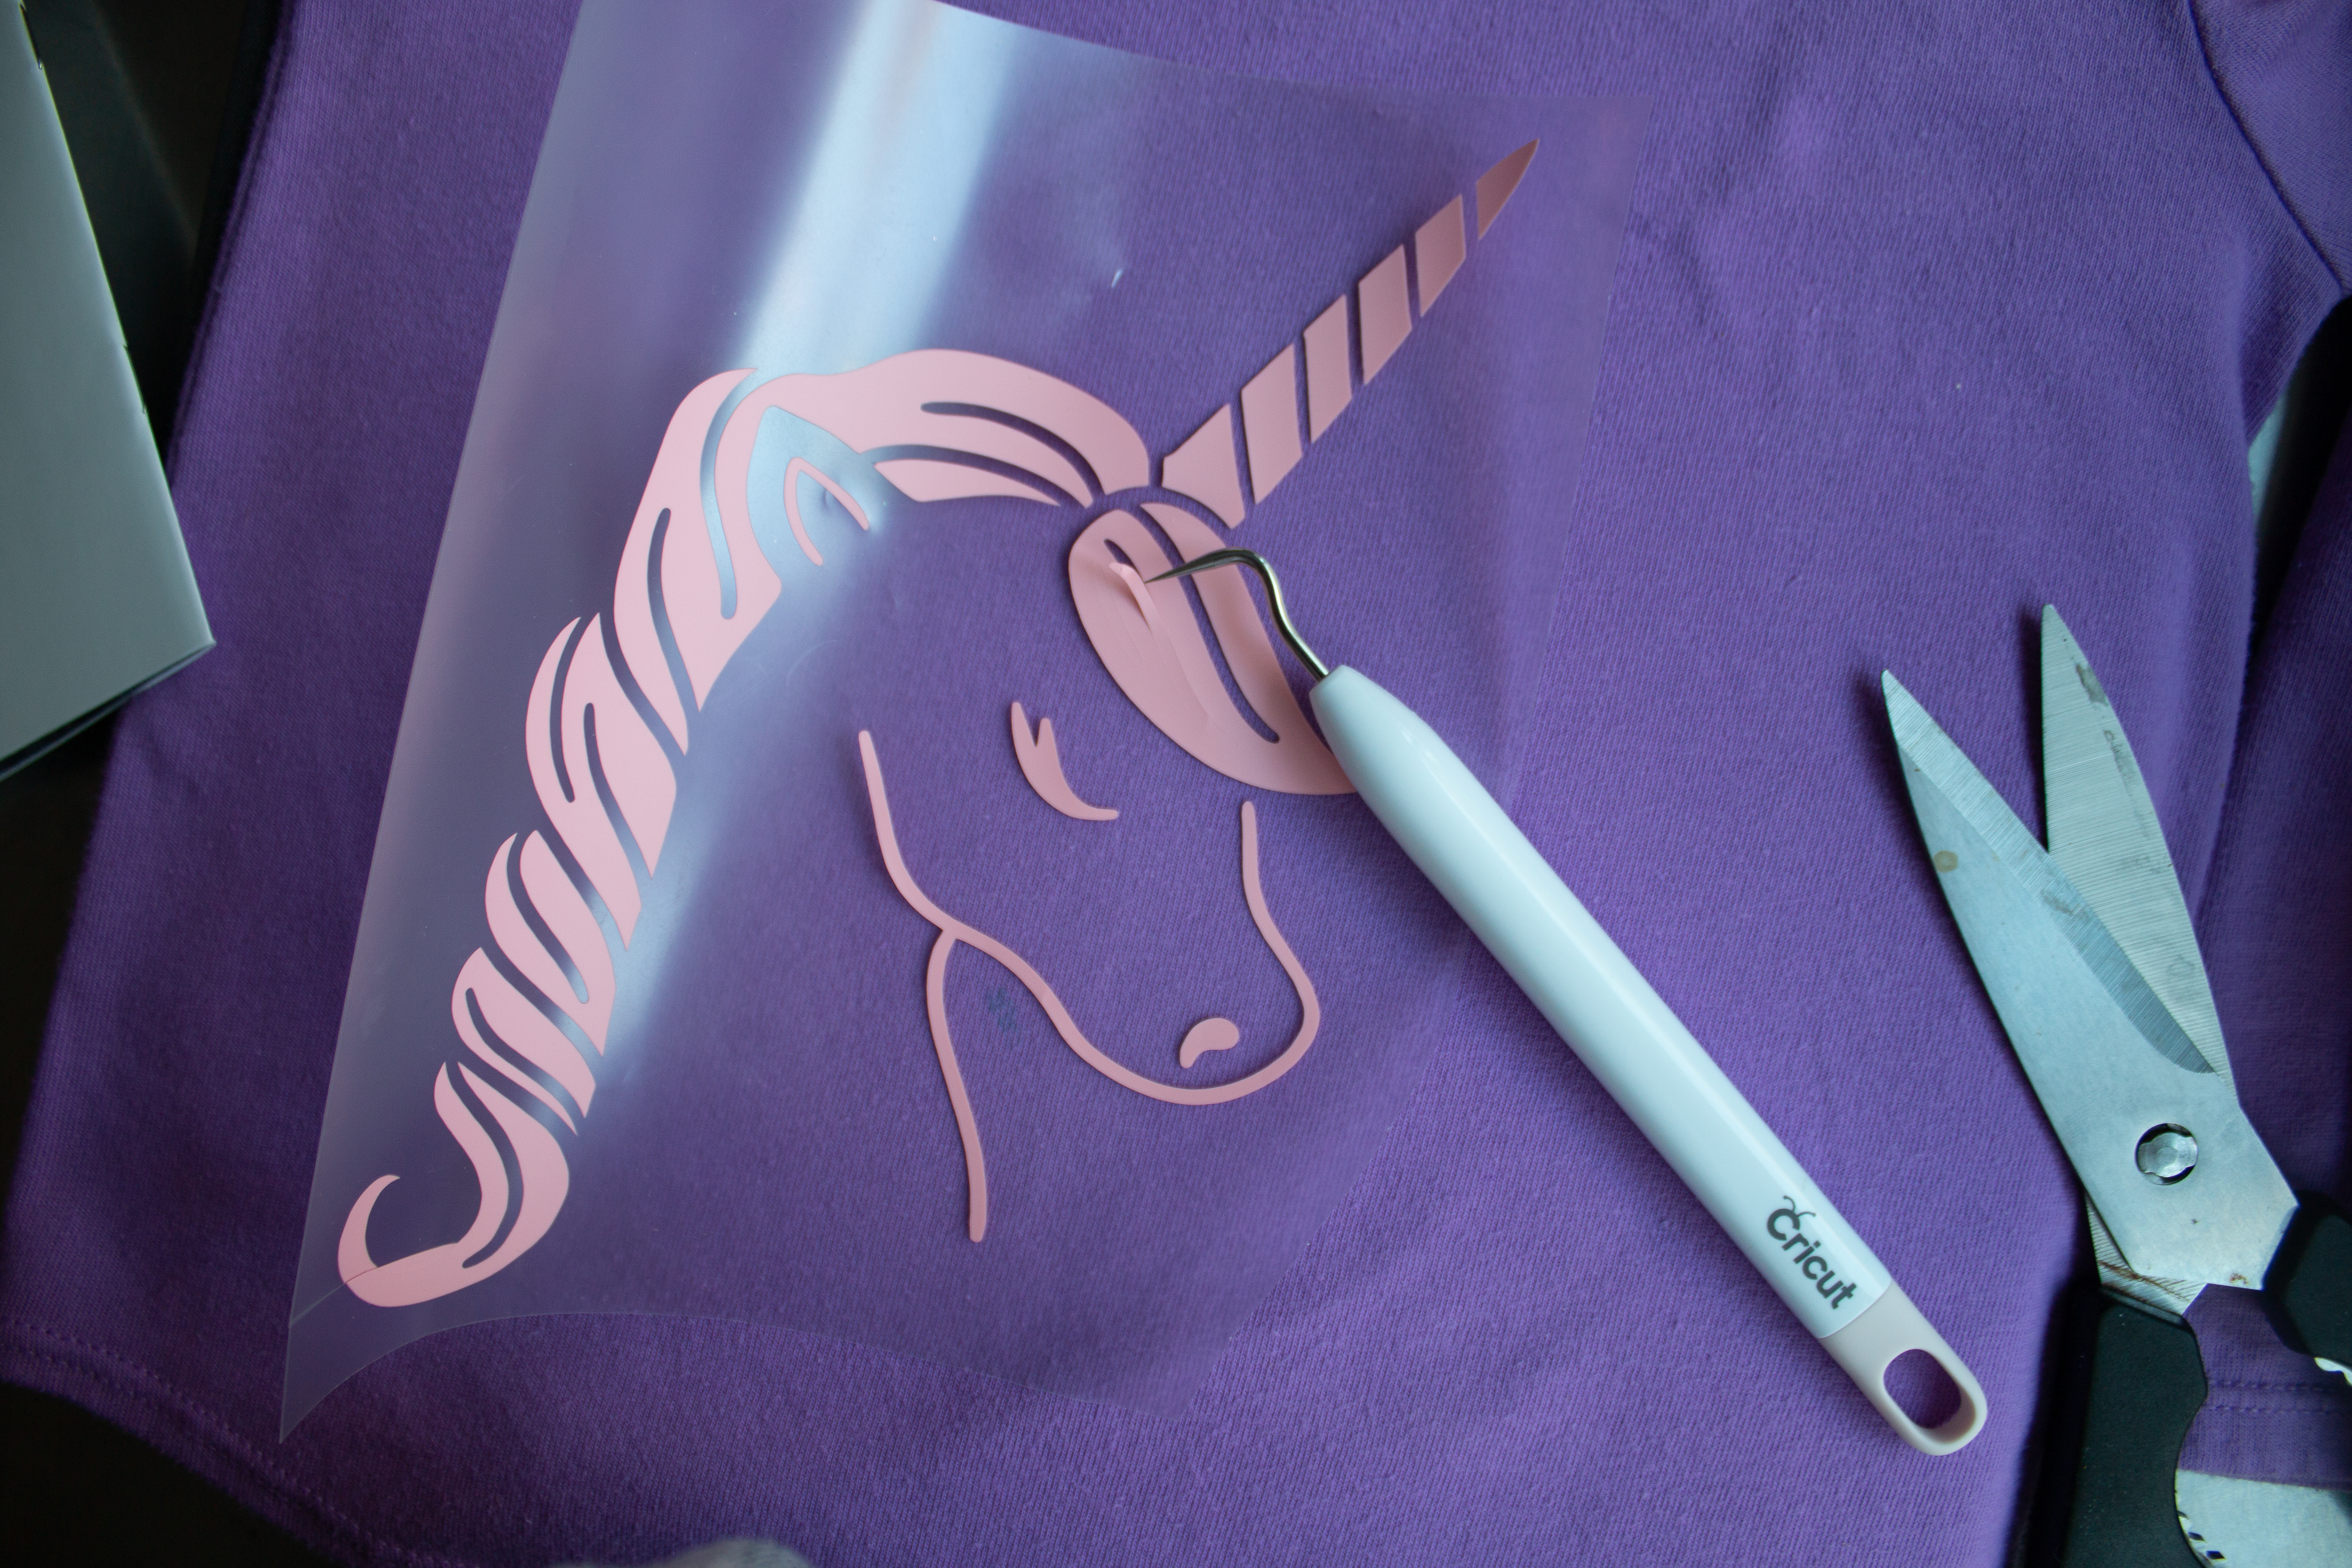
The software reminded me to flip the image and mirror it if I plan on using it as an iron-on project which I appreciated. Also, I used the Cricut Explore Air 2 Iron-On setting for the blade pressure just to make sure that I wouldn’t cut through the plastic. It took about 3 minutes for the entire unicorn to get cut out. Afterward, I cut down the vinyl and used a weeder to peel the excess vinyl off from the template.
The final step is to flip the template over so that the vinyl side is down on the shirt and use the EasyPress2 to iron it on. I used the Cricut Easypress software to determine what temperature to set it to and how long I should iron it for. The shirt was a Cotton/Poly blend so I set it to 315°F for 30 seconds.
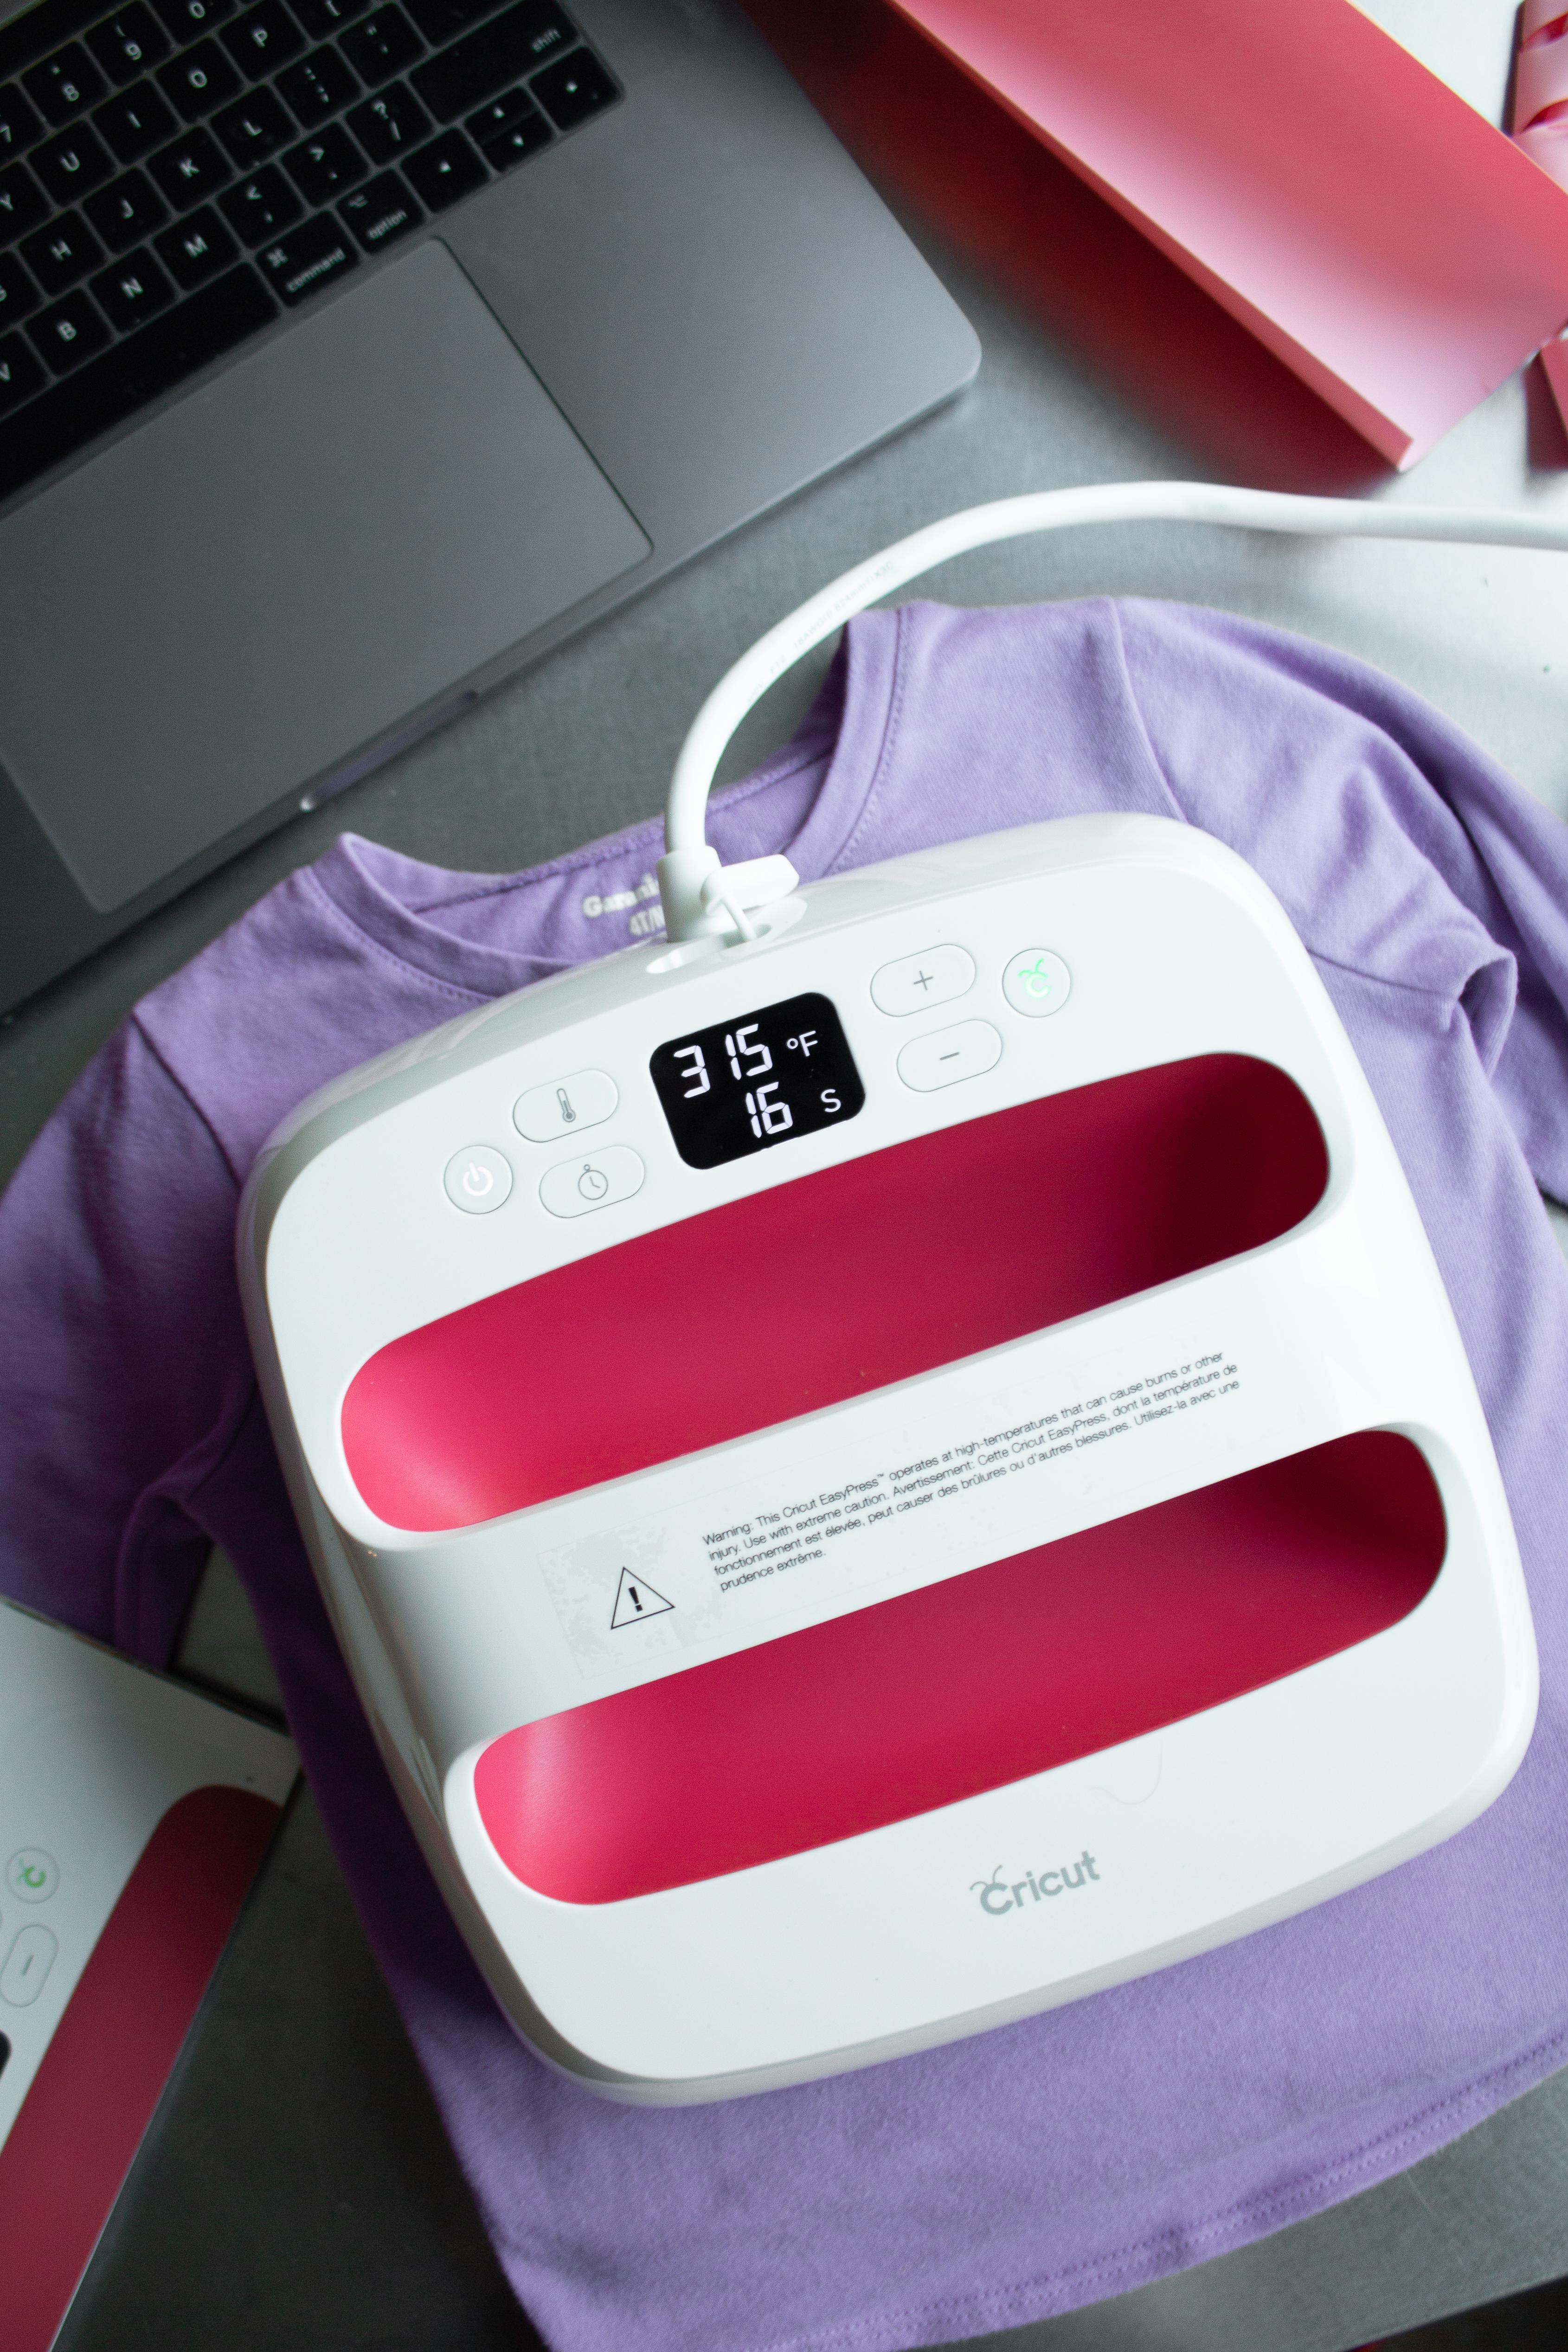
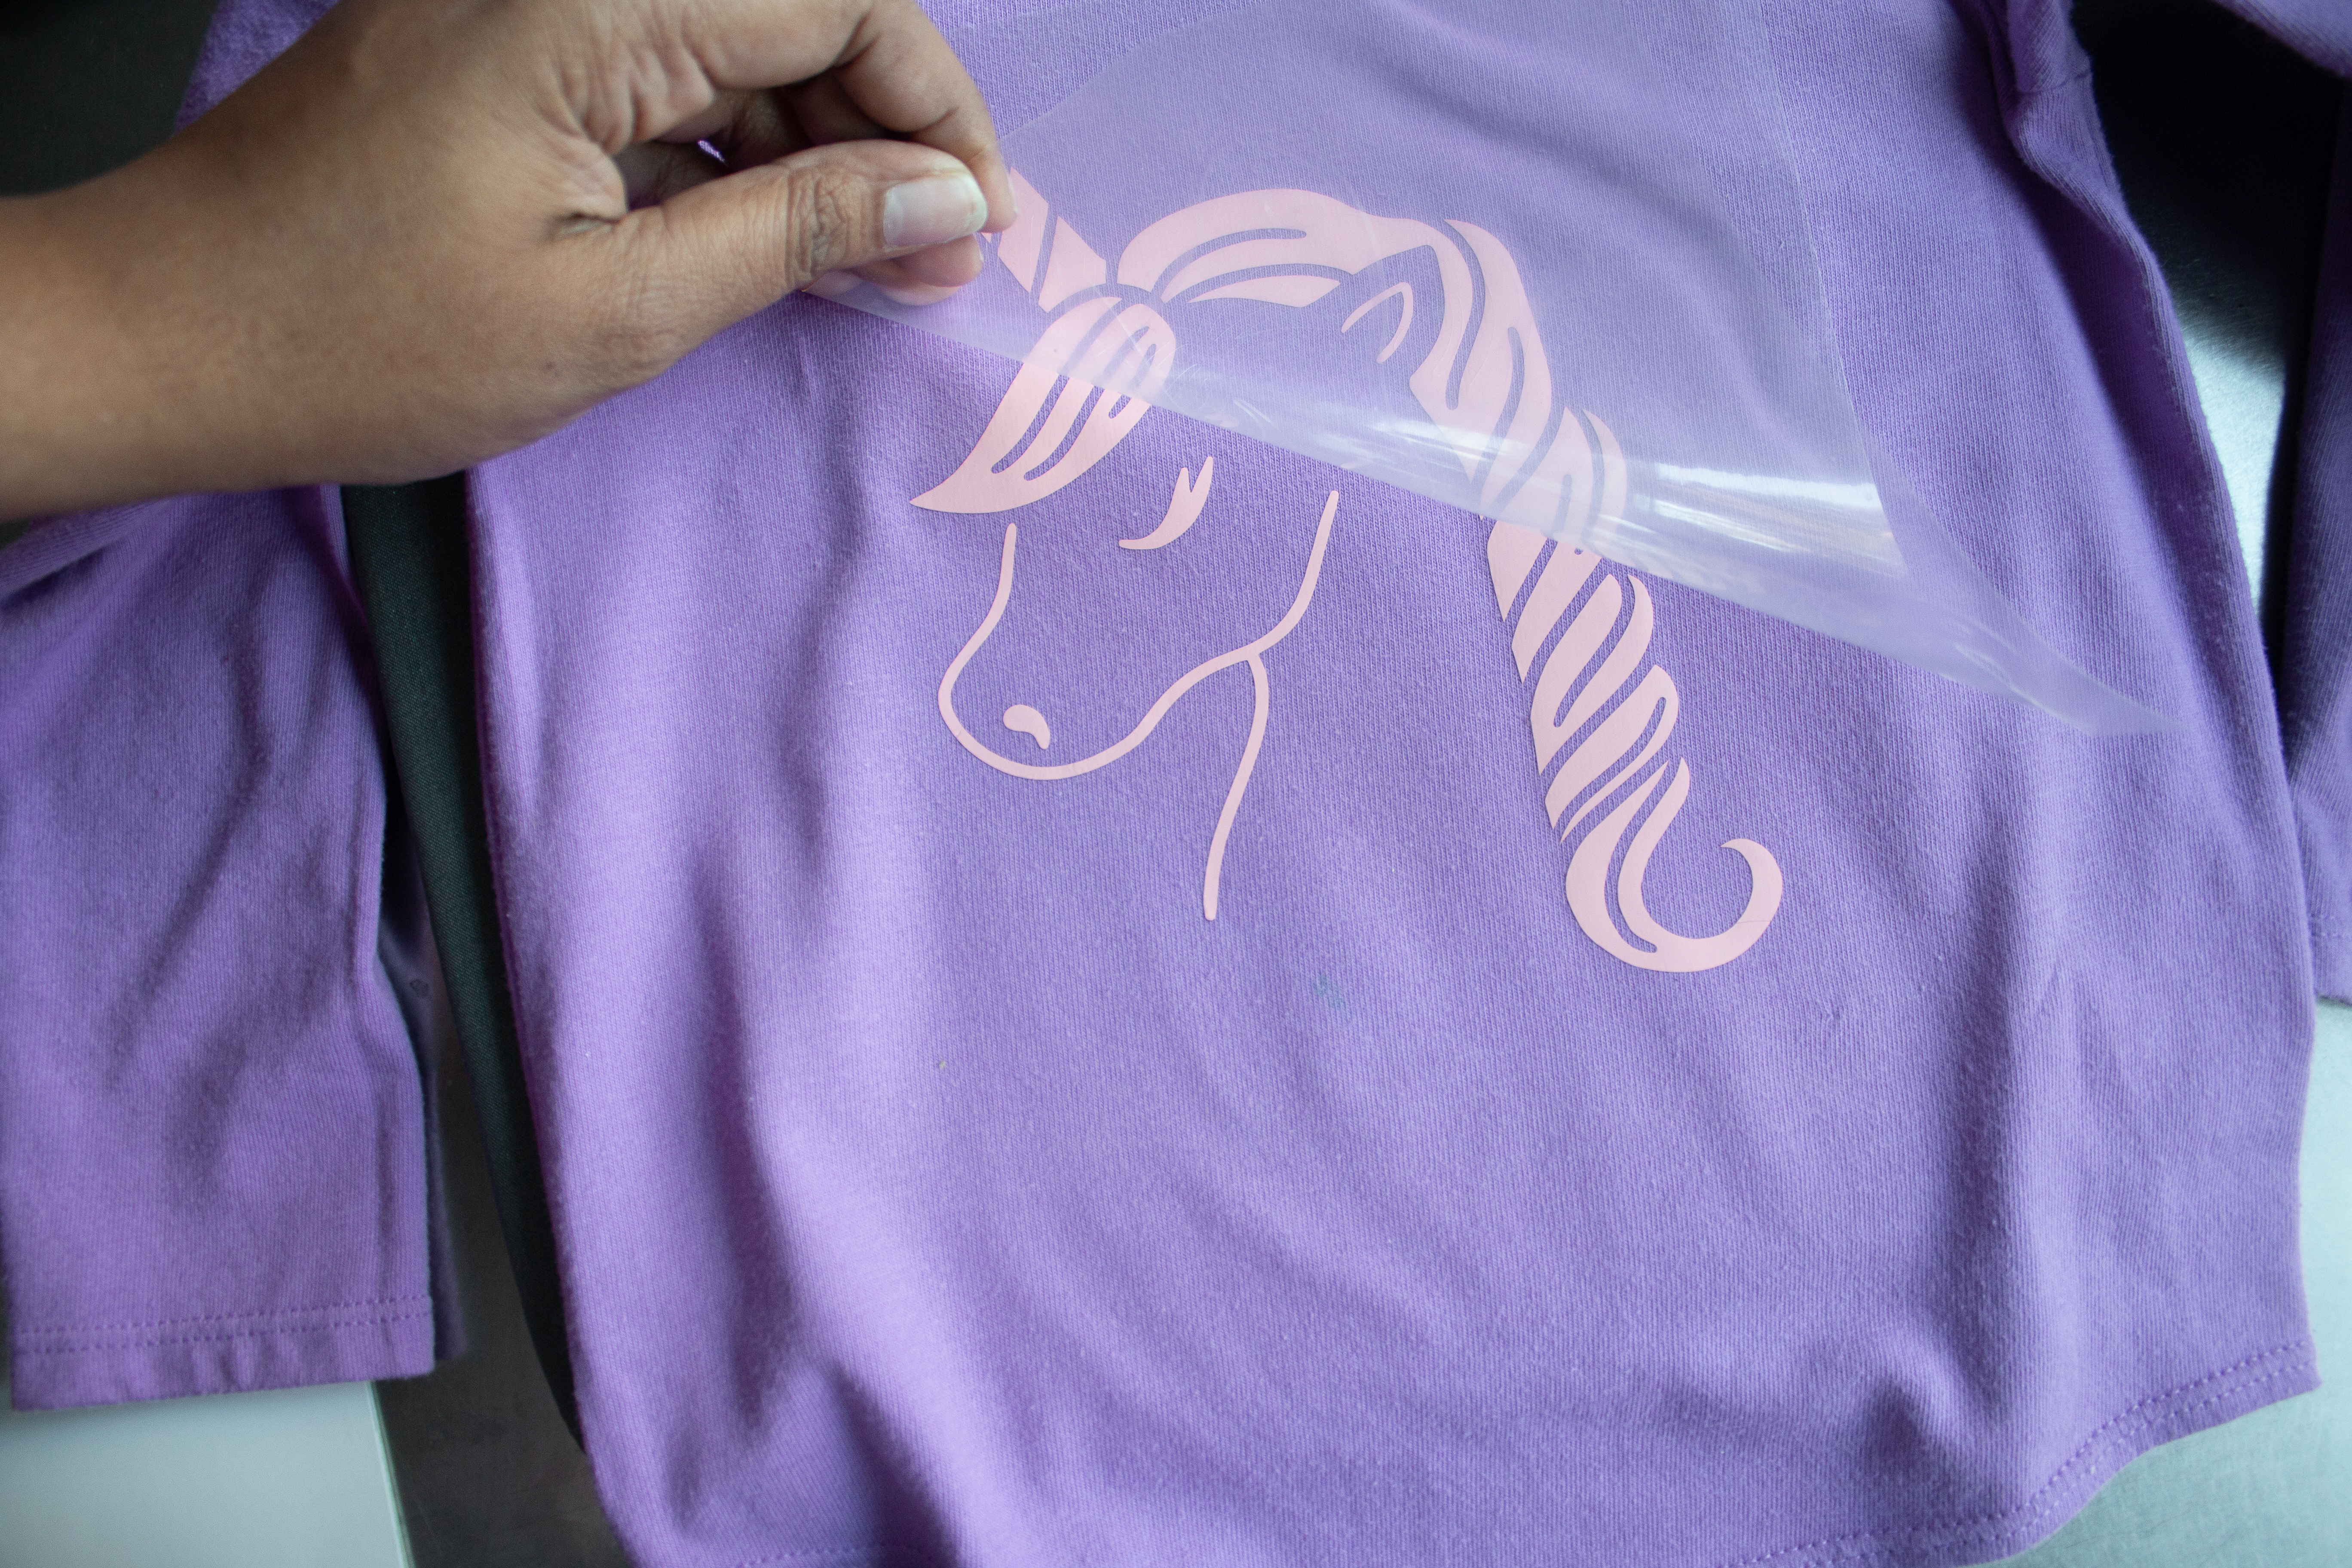
I then heated the shirt from the back for an additional 15 seconds just to make sure it’s set completely. I let the shirt cool slightly before I peeled the plastic off to reveal the transfer!
Here is the final product! Can you tell Elara is ecstatic about her new top?!

Overall, this was a super easy project and I was very surprised at how quick it was. The EasyPress2 takes the guesswork out of making sure if the vinyl has properly bound to the fabric. Elara loved that she could pick her own design and now has a massive list of all the projects she wants to do with me. As I get more familiar with the software, I can’t wait to see what else we can make!