This post contains affiliate links.
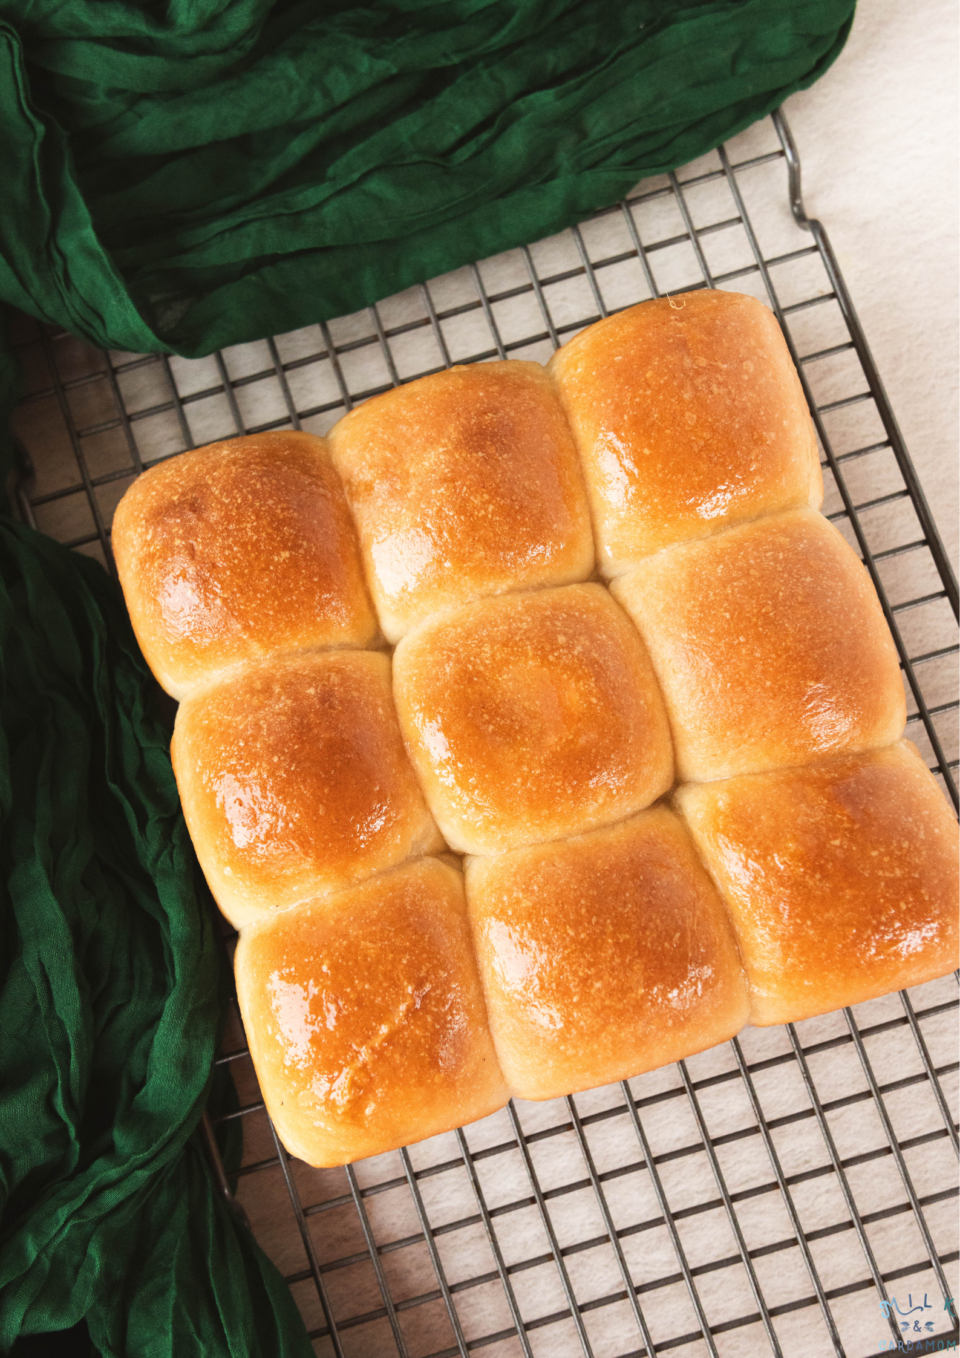
I don’t think there is anything better than a hot pav right out of the oven slathered in butter and served with pav bhaji. It’s glorious to be honest. These pav are super soft and fluffy and they’re eggless! Pav, also known as Indian bread rolls, pav plays a crucial role in iconic Indian street food dishes like Pav Bhaji and Vada Pav.
To truly understand the significance of pav in Indian cuisine, it’s essential to explore its historical roots. The history of pav starts with India’s colonial past and the influence of the Portuguese. The term “pav” originates from the Portuguese word “pão,” which simply means bread. Portuguese settlers brought their bread-making techniques to India during the colonial era, developing this beloved Indian bread.
The evolution of pav from a foreign import into an integral part of Indian culinary culture is a testament to the adaptability and the decolonization of pav. Today, pav is a versatile and cherished bread that the base of countless Indian dishes.
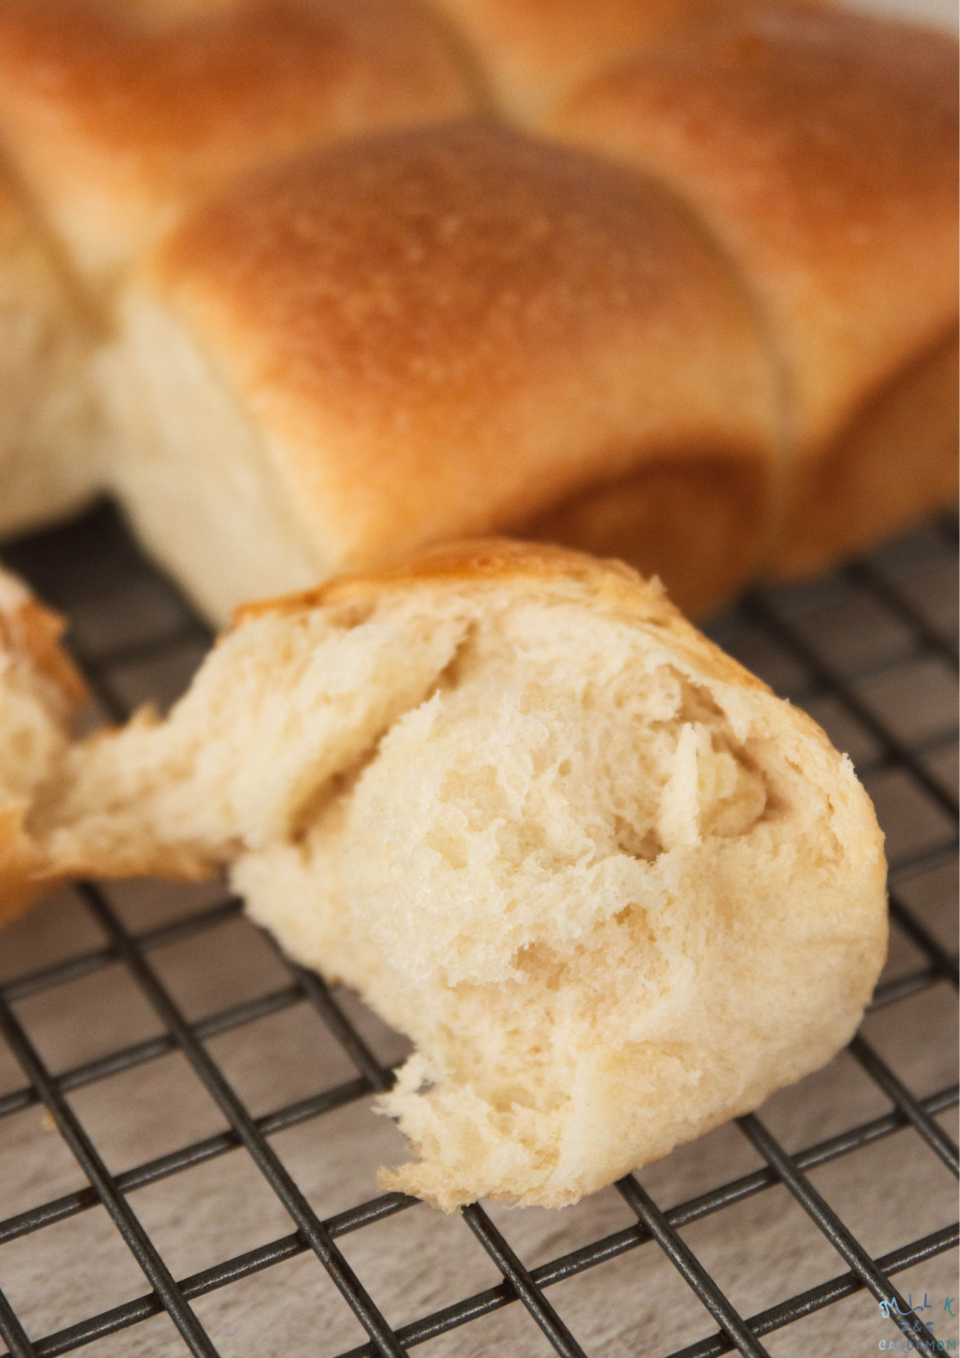
Pav’s appeal lies in its soft, slightly sweet texture; it serves as the ideal accompaniment to bhaji, aloo tiki, vada, and more. The dough itself is quite a hydrated dough, which lends itself to a light, fluffy bread. Whether you’re savoring Pav Bhaji’s hearty vegetable curry or biting into a spicy Vada Pav, pav’s delightful balance of flavor and texture is unmatched.
Whether you’re a seasoned baker or just getting started, these suggestions can help you create pav that’s soft, fluffy, and irresistibly good:
1. The Role of Yeast:
Yeast is crucial in the pav-making process. Active dry yeast or instant yeast is typically used. Properly proofing the yeast with warm milk and sugar allows for effective leavening, resulting in a soft and airy texture. If you’re using active dry yeast, use warm milk and water so that the yeast gets activated. If you’re using instant yeast, you don’t need to worry about the temperature of the liquid ingredients.
2. Kneading Technique:
Kneading the dough is a vital step in achieving the right texture. You’ll want to knead the dough until it becomes soft, smooth, and elastic. I use a stand mixer and knead on low speed using a dough hook for 12 minutes. You can also do this by hand; however, as the dough is a high-hydration dough, it’s quite sticky. Kneading helps to develop the gluten and create the ideal bread structure so that when you squish it down, it puffs right back up!
3. Proofing Time:
My pav dough has 3 proofs. Once to double it, another time to rest it, and then again to double in size. Proofing helps the dough relax, develop gluten, and provide a tight yet tender crumb. I like to turn my oven to 100°F and proof my dough in my oven. If your oven doesn’t go that low, you can turn your oven light on and proof the dough in the oven without turning it on.
4. Shaping and Baking:
When it’s time to shape the dough, I like to weigh it and divide that number by 9 to get how much each of my dough balls needs to weigh. You can eyeball it but there’s a chance one of your rolls might be bigger than the others.
5. Butter is key!
I butter the bread twice! Once right after rolling and covered to proof one last time and then again once the pav is out of the oven, brush it with a touch of butter. This adds a gorgeous sheen and keeps your rolls soft.
If you make these pav, be sure to tag me @milkandcardamom on social media so I can see them! Happy baking!
Print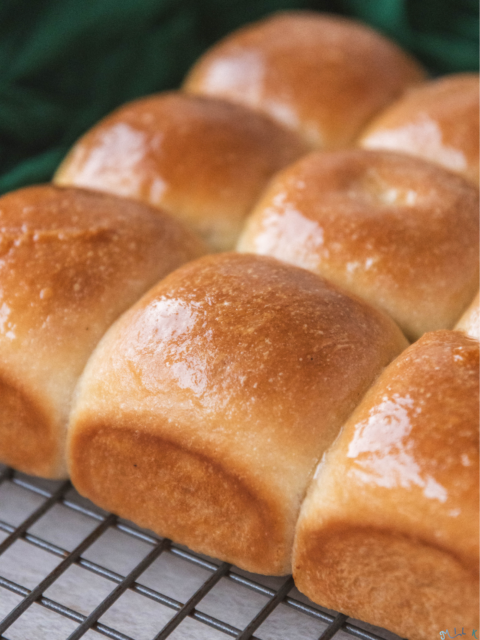
The Fluffiest Pav Ever!
- Yield: 9 1x
- Diet: Vegetarian
Description
Makes 9 fluffy warm perfect pav.
Ingredients
- 107 g (7.5 tbsp) water
- 107 g (7.5 tbsp) whole milk
- 3 g (1 tsp) instant yeast
- 71 g (1/3 cup) unsalted butter, room temperature, plus 1/4 cup melted
- 350 g (3 cups) all-purpose flour
- 8 g (1 tsp) kosher salt, (use 1 1/2 tsp table salt)
- 12 g (1 tbsp) granulated sugar
Instructions
- Add water, milk, yeast, 1/3 cup (71 g) butter, flour, salt and sugar to a bowl of a stand mixer. Use a spatula to mix the mixture into a shaggy dough. Knead the dough on low speed using the dough hook attachment for 12 minutes, scraping the dough down halfway through. Grease a bowl or container with a little melted butter and place the dough into the greased bowl. Cover and let rise for 1 1/2 to 2 hours or until doubled in size. Grease a 9×9 pan with butter and set aside.
- Punch the dough down and knead the dough on a lightly floured surface for 2 minutes. Flatten and fold the dough into a square and place the dough back into the greased bowl, and cover. Proof for 30 minutes.
- Remove the dough and divide the dough into 9 equal portions (about 73 g per dough ball). I suggest using a scale if you have one for even pav. Flatten your dough ball, gather the edges, and pinch them together. Flip the dough ball so the pinched edges are on the bottom and cup your hand around the dough ball so that your pinky and the side of your palm is touching the work surface and gently roll the dough until you feel the dough tighten slightly. Place your dough balls into the greased 8×8 baking pan, leaving space in between each one Repeat until all the dough balls are in the pan. Brush each dough ball with melted butter and cover with plastic wrap. Proof the dough for 30-45 minutes.
- Preheat oven to 400°F.
- Bake the proofed pav for 10 minutes, then turn the heat down to 350°F and bake for 15 minutes or until the center pav registers at 200°F. Remove and brush the tops with additional melted butter and cool for 10 minutes before removing the pav from the pan and cooling on a rack. Store leftover pav in a brown paper bag for up to 2-3 days.
- Category: Main
- Cuisine: Indian